🎆 Visuals, Lights and Controllers for My DJ Sets
If you have been following along, you might remember my posts about getting back on the decks and about how I manage my music library. Well, the DJ hobby did not stop there - since the middle of August I have been building all the stuff around the decks. An app that draws visuals to the music, LED bars that follow it, and a way to control all of it from the controllers on my desk!
It got a lot bigger than I planned (as these things usually do), so I will just go through it piece by piece.
Why visuals at all?
Usually visuals at a DJ set are somebody else’s job - a VJ sitting next to the DJ and doing nothing else. I wanted the opposite. Something that mostly runs by itself while I mix, and that I can nudge with a pad or a fader whenever I feel like it.
So I built DJ Visuals. It’s an Electron app with React and Three.js, and the most important thing for me was that it has two windows, which don’t depend on each other at all. One is the control window, where I pick scenes and tweak them. The other one is the fullscreen output that goes to the screen. I can close the control window in the middle of a set and the output just keeps going. And if a scene ever crashes, the output falls back to a calm ambient scene, instead of showing an error dialog on the big screen.
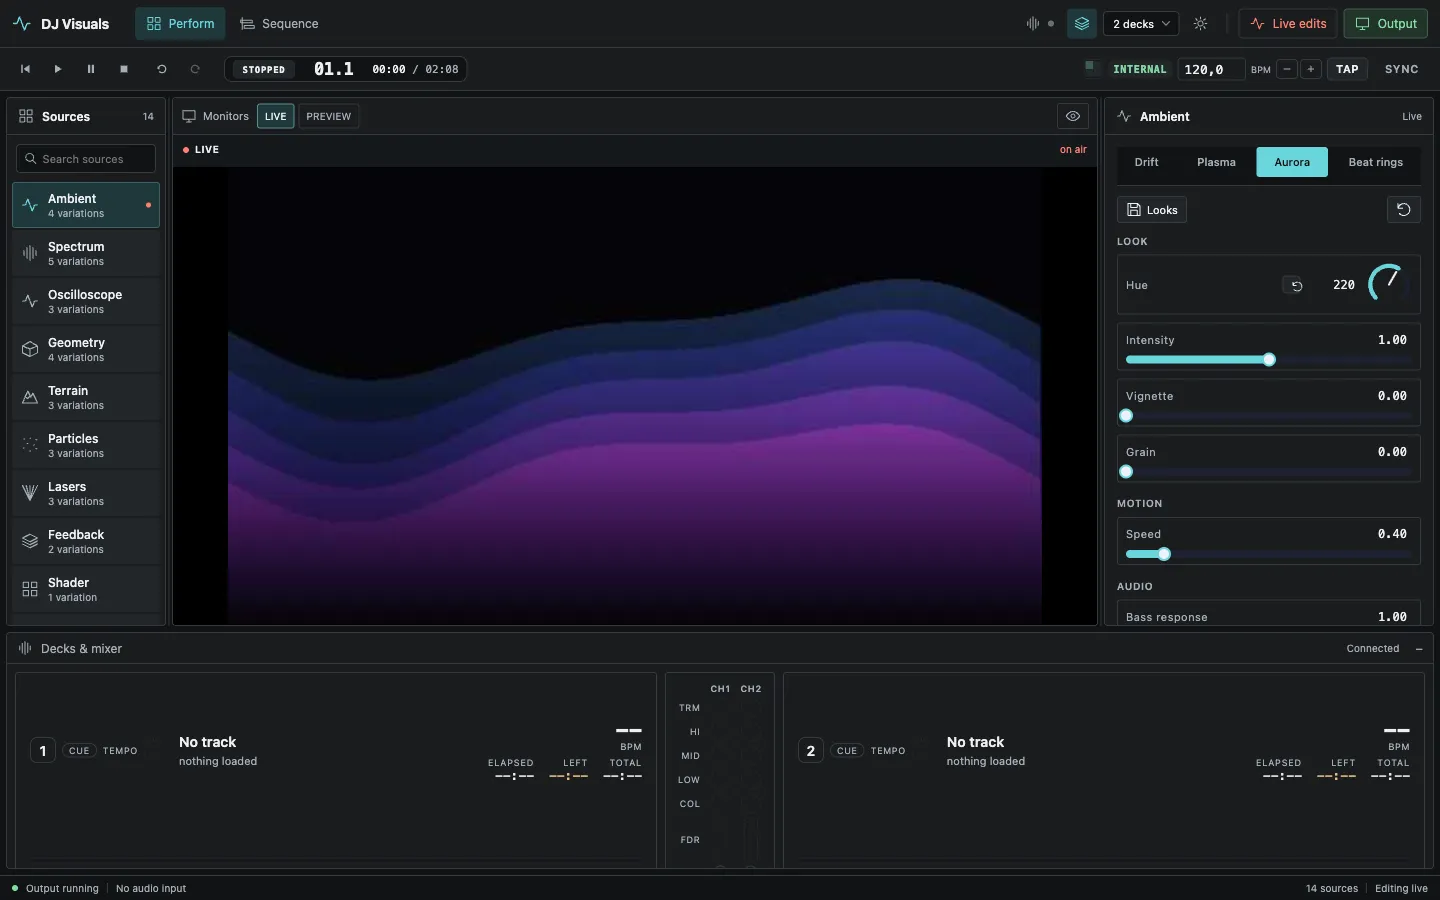
This is the Perform screen. Sources on the left (fourteen of them, each with its own variations), whatever is on air in the middle, and the settings of the running scene on the right - here the Aurora one. The panel at the bottom shows what my DJ controller is doing, so the trim, EQ, filter and channel fader for each deck.
Reacting to the music
In the first versions, the scenes bounced with the bass on their own. Which sounds fun, but it meant every scene moved the same way, whether I wanted it to or not. I wanted every reaction to be something I set up myself.
So now no scene reacts to the music by itself. Every scene has two inputs, Energy and Kick, and both start at zero. If I want the camera to push in on the kick, or the colours to get stronger with the bass, I bind it on purpose (with a curve and a release, so it doesn’t flicker). Only the scenes that literally draw the sound, like the spectrum and the oscilloscope, read the audio directly. Yes, it’s more work to set up a look, but now every movement on the screen is one I picked myself.
Looks, transitions and the T-bar
A saved scene with all its settings is called a Look. Looks launch from a grid, the keyboard or a MIDI pad, through one of 55 GPU transitions. A transition can be a few beats or seconds long, and it can wait for the next beat or bar, so a launch actually lands on the music and not on some random moment.
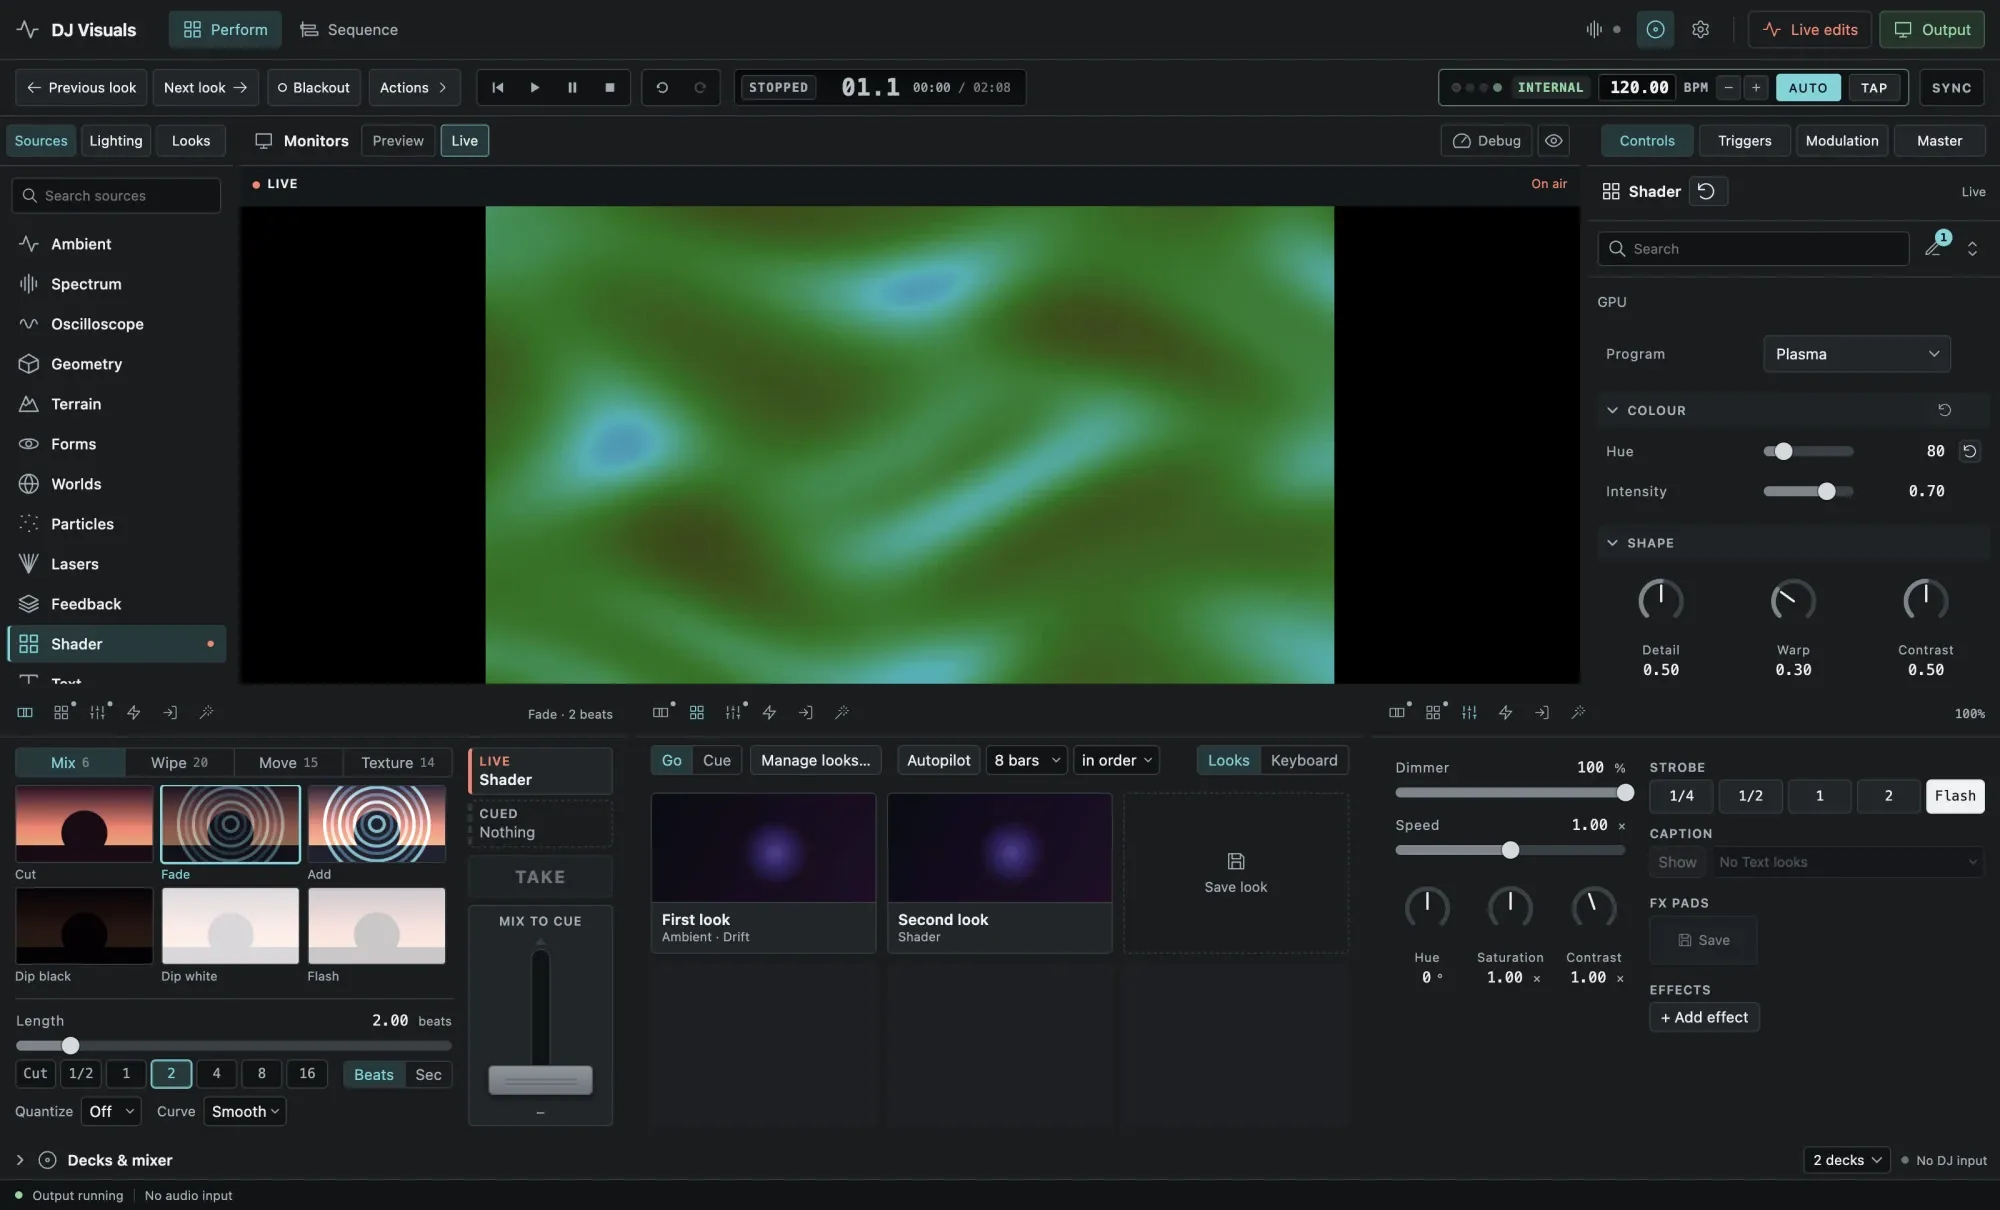
That’s the newer version of the Perform screen, with one of the shaders (Plasma) on air. The transitions at the bottom left are grouped into Mix, Wipe, Move and Texture, and in the middle there is Autopilot, which steps through the Looks on its own every few bars. Oh, and there is a master bus with 75 post effects, a dimmer, strobe and a blackout, which work over any scene!
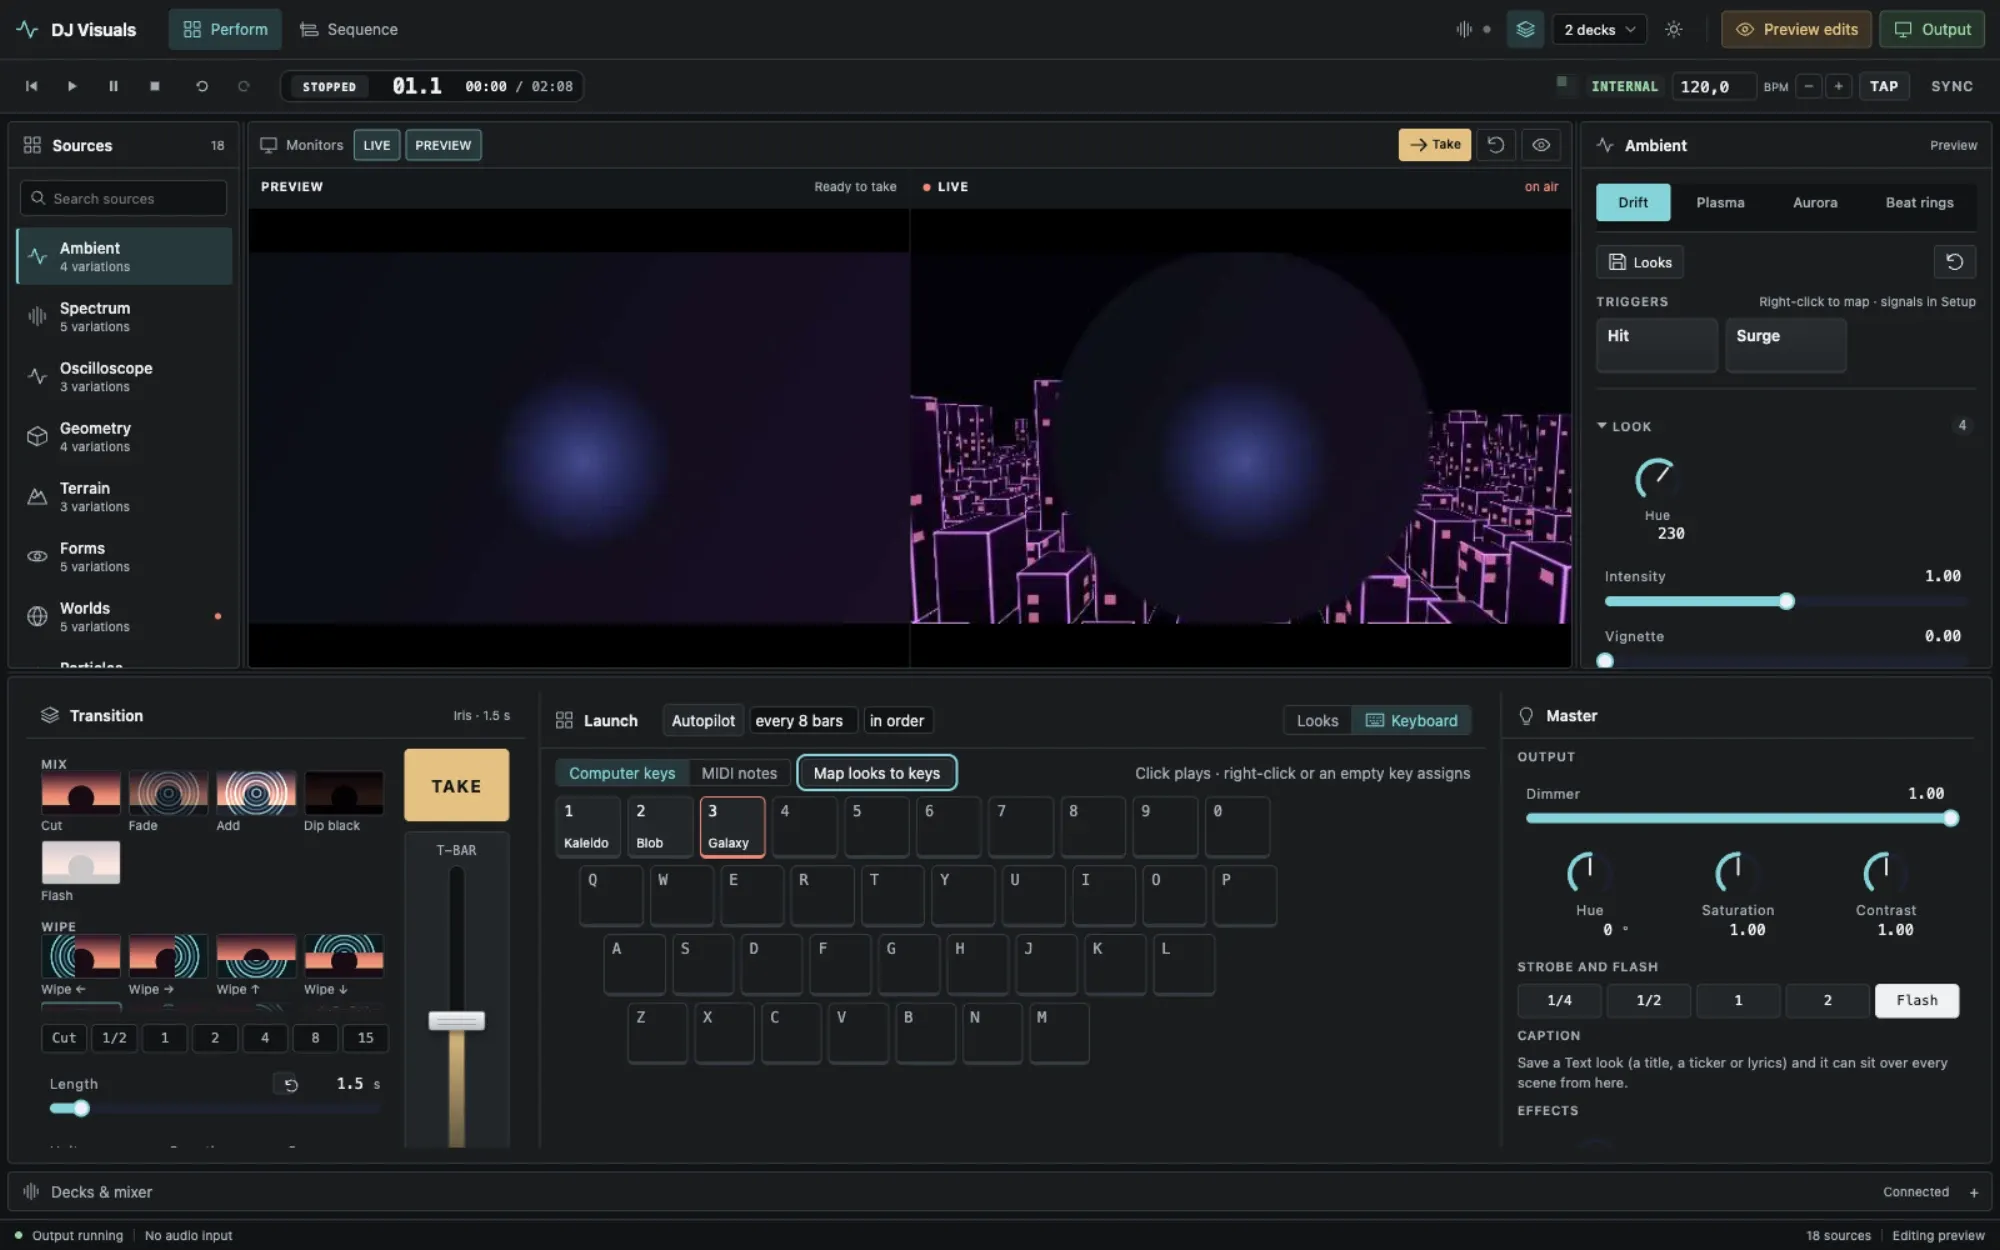
The idea of preview and live I borrowed from broadcast mixers. I can cue a Look onto the preview monitor, check that it looks right, and then hit Take - or mix it in by hand with the T-bar.
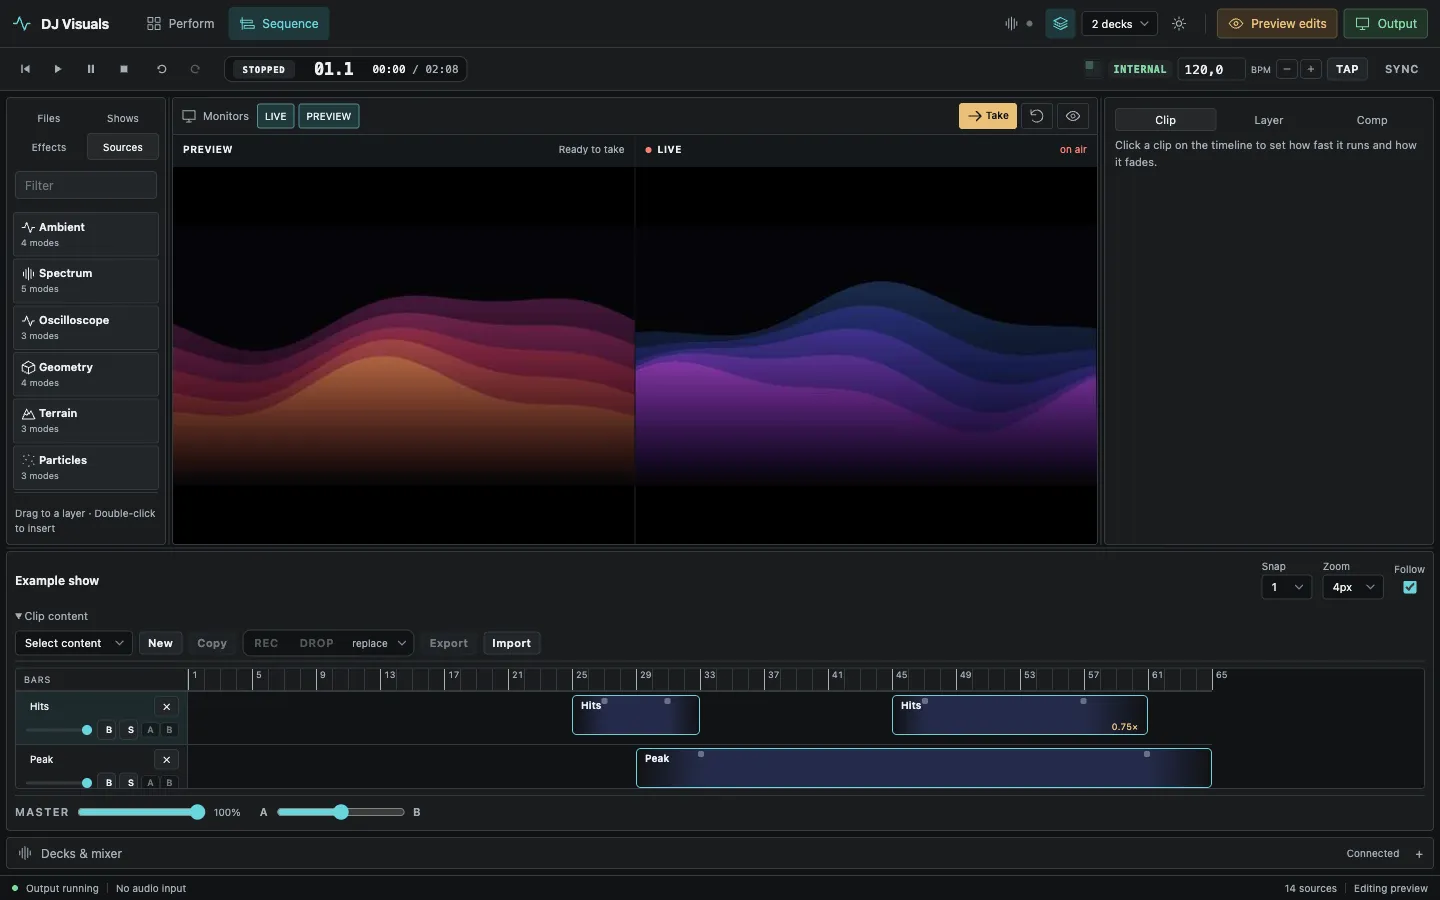
And for when I want something planned instead of improvised, there is the Sequence screen. It’s a timeline in bars, where I can arrange clips ahead of time, like the “Hits” and “Peak” ones here:
Reading the FLX4 and FLX10
I play on the Pioneer DJ DDJ-FLX10 now, and I started out on the DDJ-FLX4. I wanted the visuals to know what’s happening on the controller, but without running the visual app on the DJ laptop.
Enter the Sender! It’s a small Tauri tray app (written in Rust), which runs on the DJ laptop and sends the controller state over the network to the machine that renders the visuals. So the DJ laptop doesn’t render anything and stays free for the actual DJing.
The controller mappings come from AlphaTheta’s published MIDI message list for the FLX10, and for the FLX4 I cross-checked them against the Mixxx mapping. And the nice surprise? Both controllers number their mixer the same way - trim, EQ, channel faders, the filter knob and the crossfader all sit on the same messages. The Sender picks the right preset from the name of the MIDI port, so there is nothing to set up when I switch between them.
The position in the track was harder. The controller tells me when PLAY is pressed, so the Sender keeps a clock per deck that runs while it plays and stops when it’s paused. But it can’t see a cue jump or a loop, so that position is flagged as an estimate, and anything that needs the real beat simply ignores it. For proper position and phrase data there is an optional Rekordbox reader on the Mac (off by default). The FLX10’s jog wheel screens are a whole other story, and probably a whole other blog post. Somebody already decoded their USB protocol from packet captures, and I have it written into the Sender, but driving the screens from my own software is still an unfinished experiment.
The Akai APC Mini
The FLX10 is for DJing, so for the visuals I wanted a separate controller. I went with an Akai APC Mini MKII - a grid of 64 pads, a row of buttons on the side and the bottom, and nine faders.
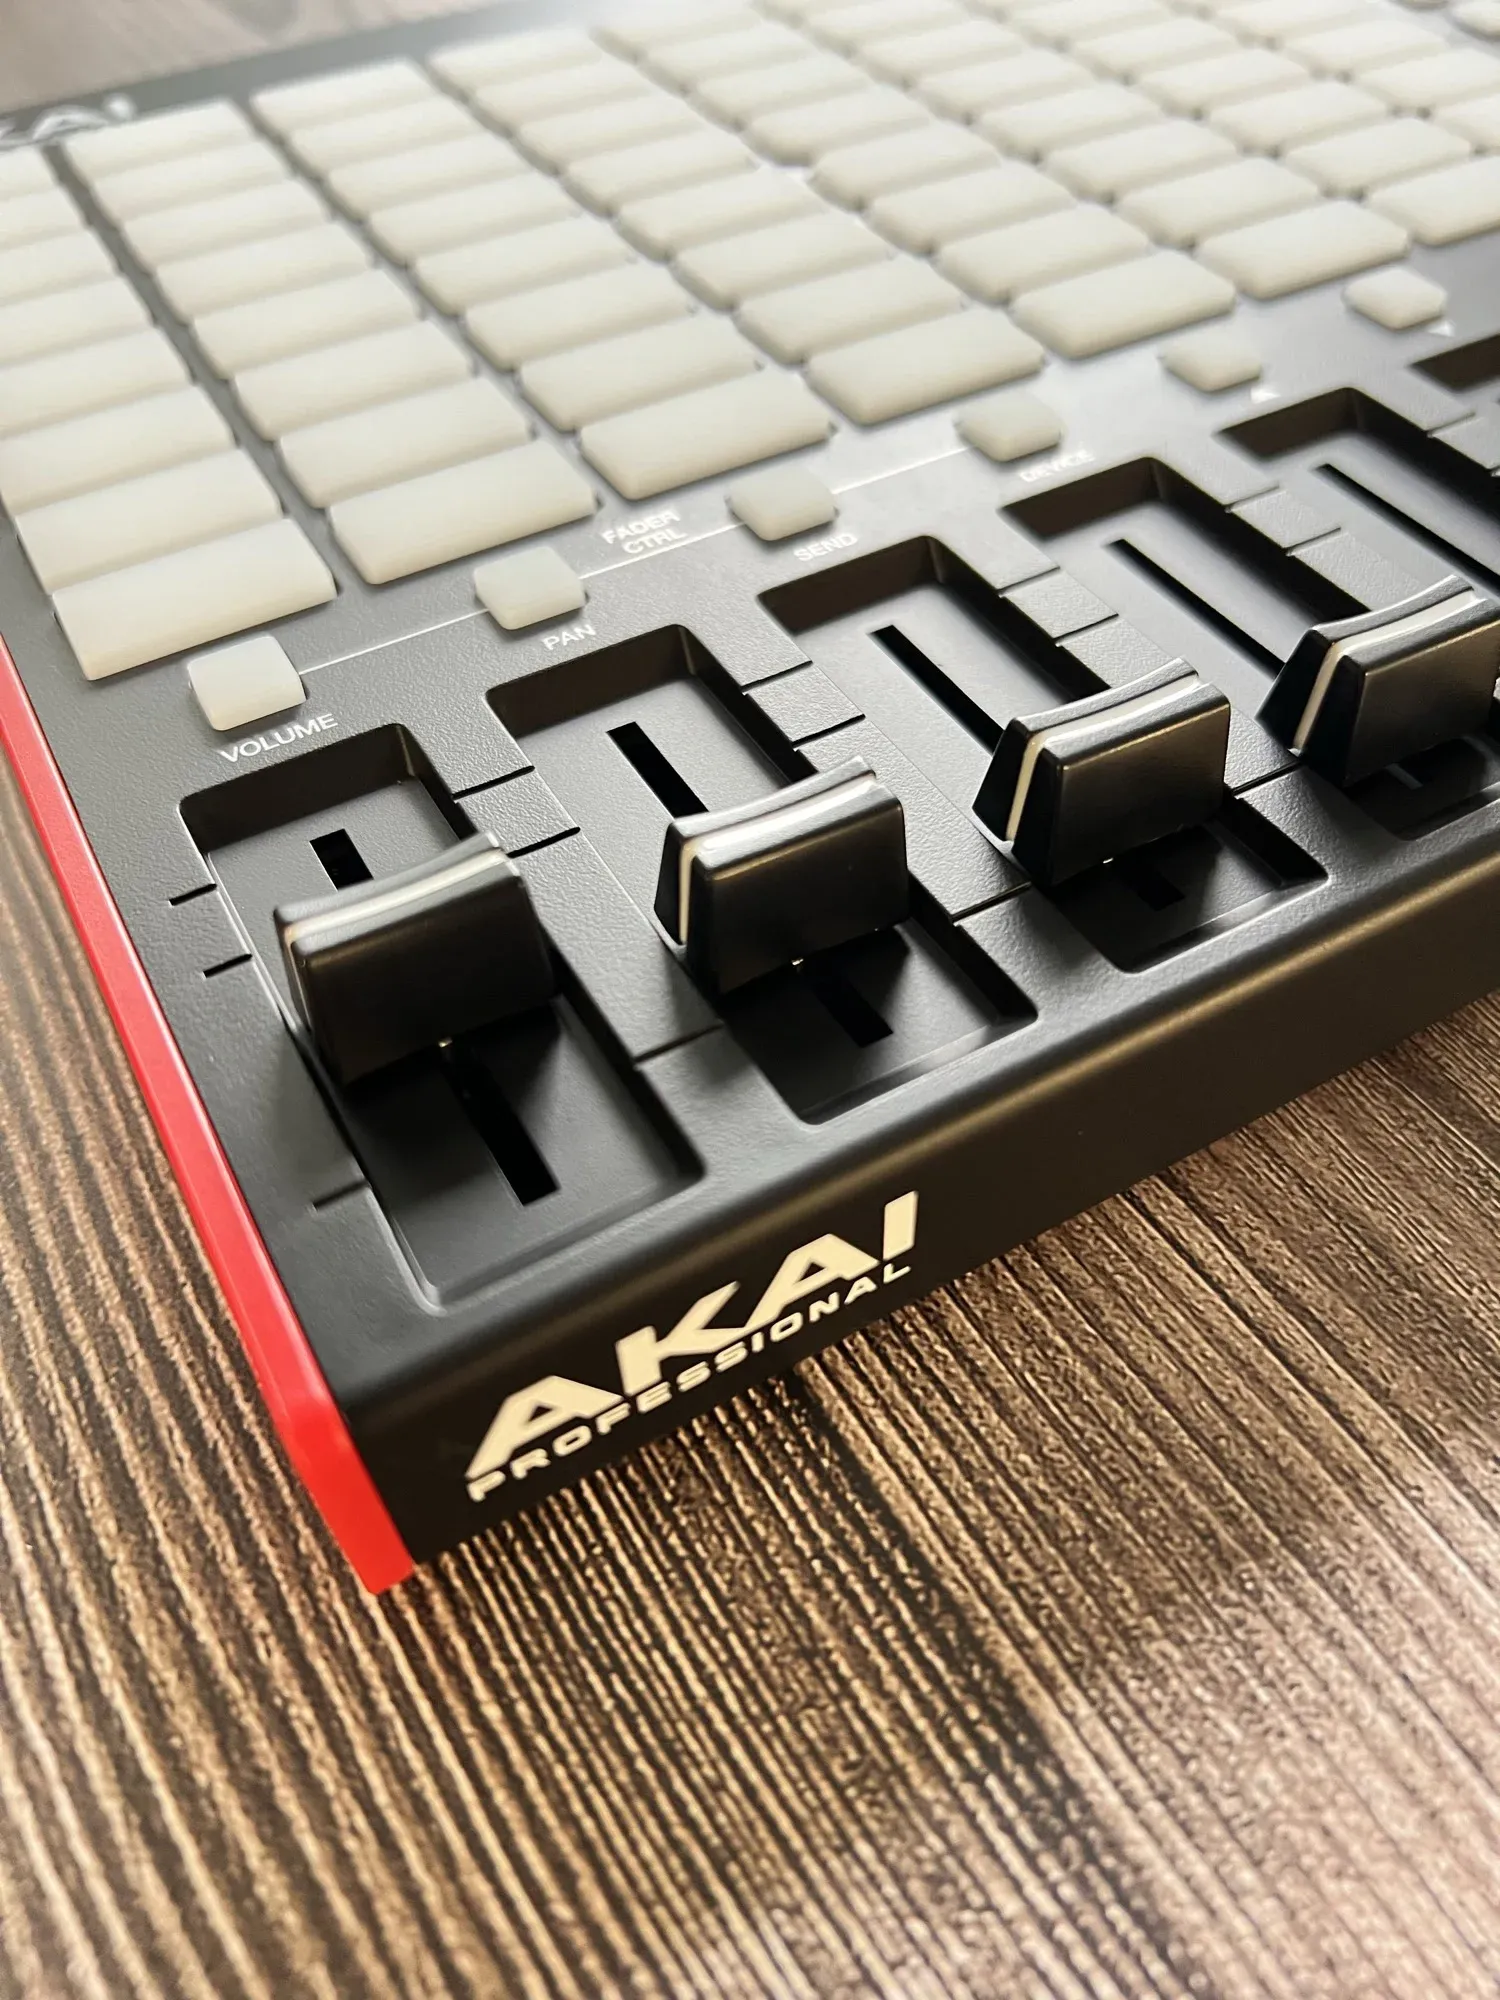
Every pad, button and fader can be mapped to anything in the app, but out of the box it has my own layout. The pads launch Looks, the bottom buttons start and stop the show and step through the pages, the side buttons do the tempo (tap and sync included), and the last one is a blackout. Shift gives every button a second job, and the faders have four modes - named after the Volume, Pan, Send and Device labels printed on the APC - so the same nine faders can control four different sets of things.
The pads light up in the colour of the Look they launch, so I can see at a glance what’s live. And there is a map of the APC inside the app that mirrors the real device, every light included.
Two small things took way more time than they should have (of course). The first was a stutter when I moved two faders at once. Every fader message re-rendered the whole control window, so with two or more faders moving, the app simply fell behind. Applying the fader messages once per frame fixed it. The second one was the lights staying on after quitting, which sounds minor, until the APC is sitting there all lit up on a dark desk! Now quitting turns every light off, and nothing turns them back on.
My own LED bars
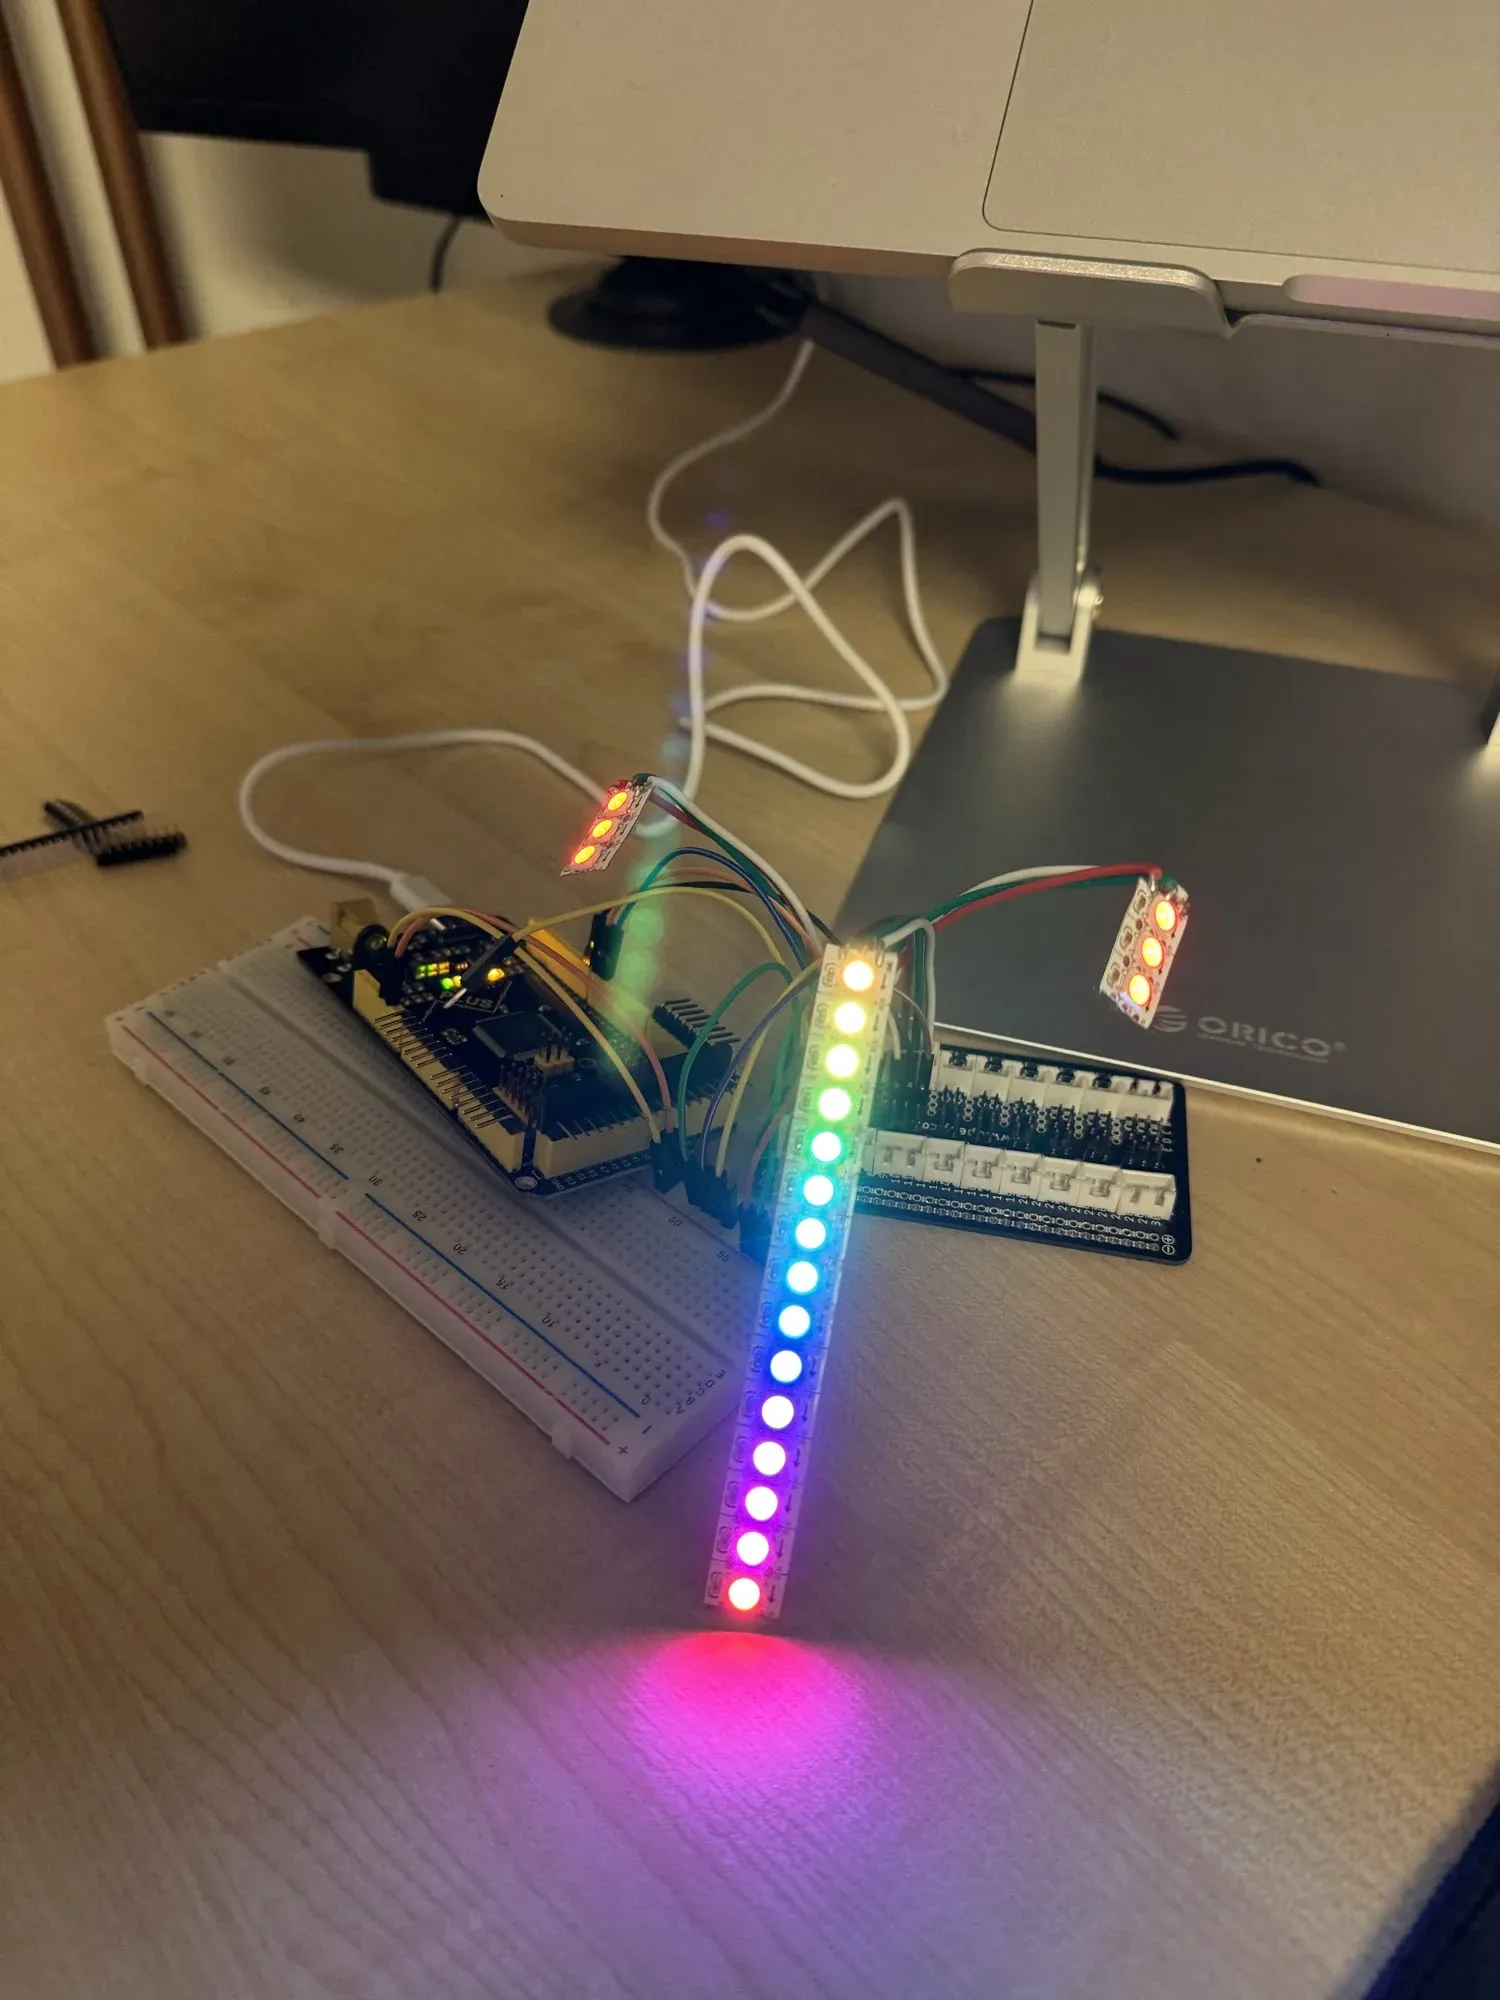
And then there are the LEDs! I wanted the room to move with the screen, so I wired WS2812 LED strips to an Arduino Mega 2560 and wrote the firmware for it myself.
It all started on a breadboard. This is how it looked one day before the next version - jumper wires everywhere, one bare LED stick and two small LED pieces to test with:
The next day I moved the wiring onto a custom board with connectors, and the strips went into three bars of different heights, each one inside a white diffuser:
And this is how it looks on the set today. Two tall bars behind the FLX10, a short one between them, and the APC right in front:
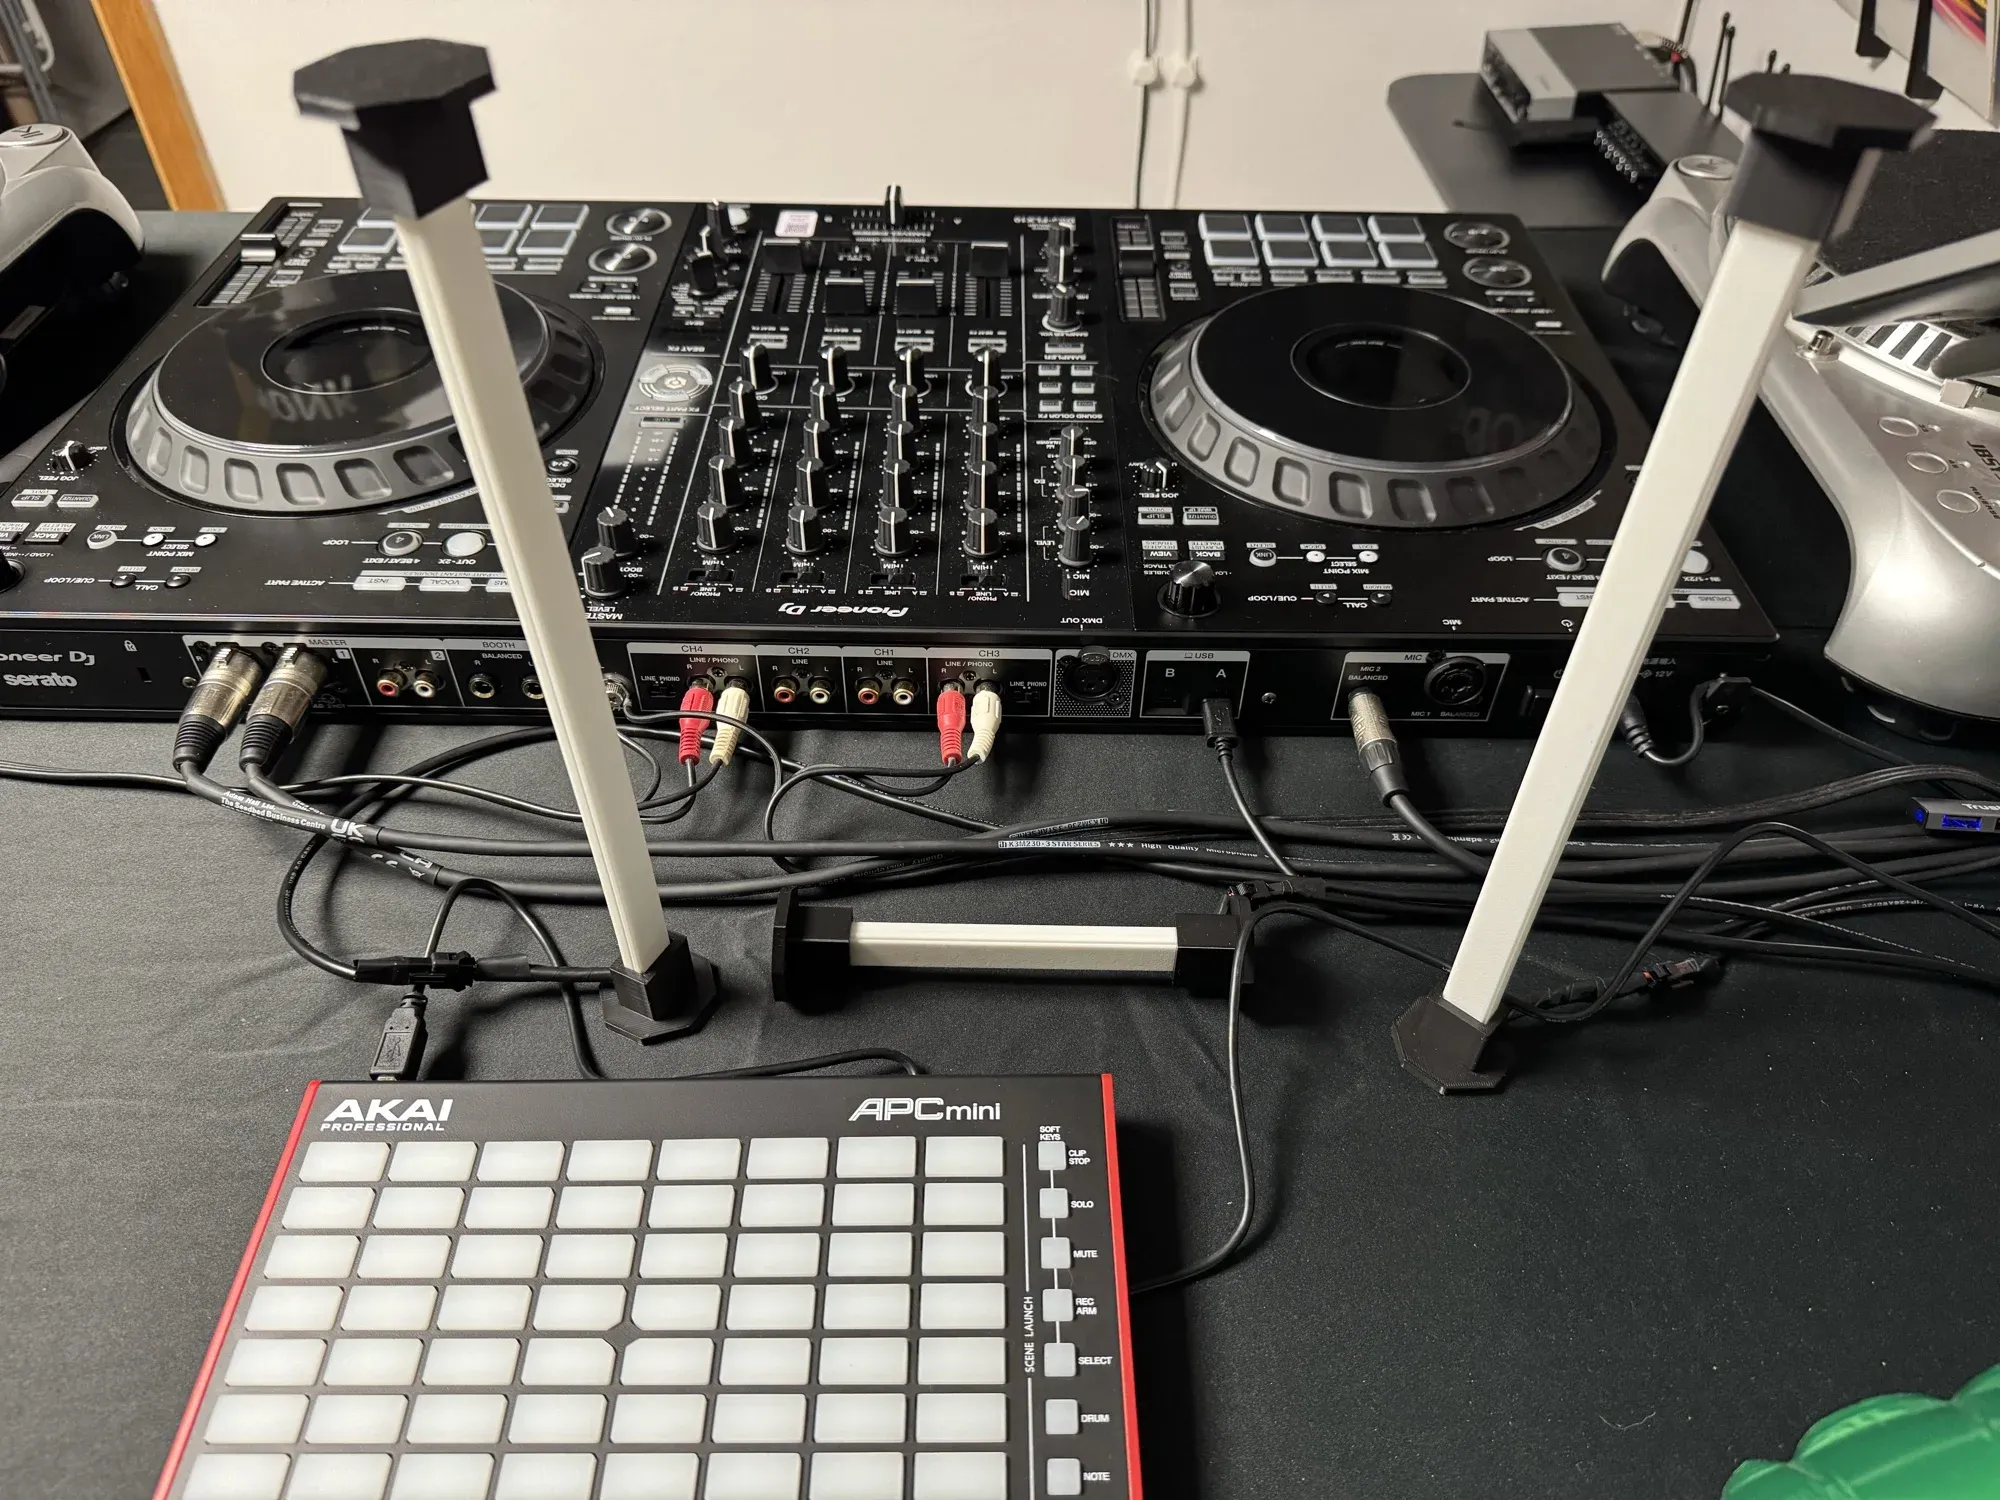
The Mega itself doesn’t do any thinking. DJ Visuals works out the colour of every LED from the same audio analysis as the visuals, and sends the frames to the board over USB. One board can drive up to fifteen outputs, each one either a strip of up to 256 LEDs or a plain RGB LED. If I ever run out of pins, I just add another board.
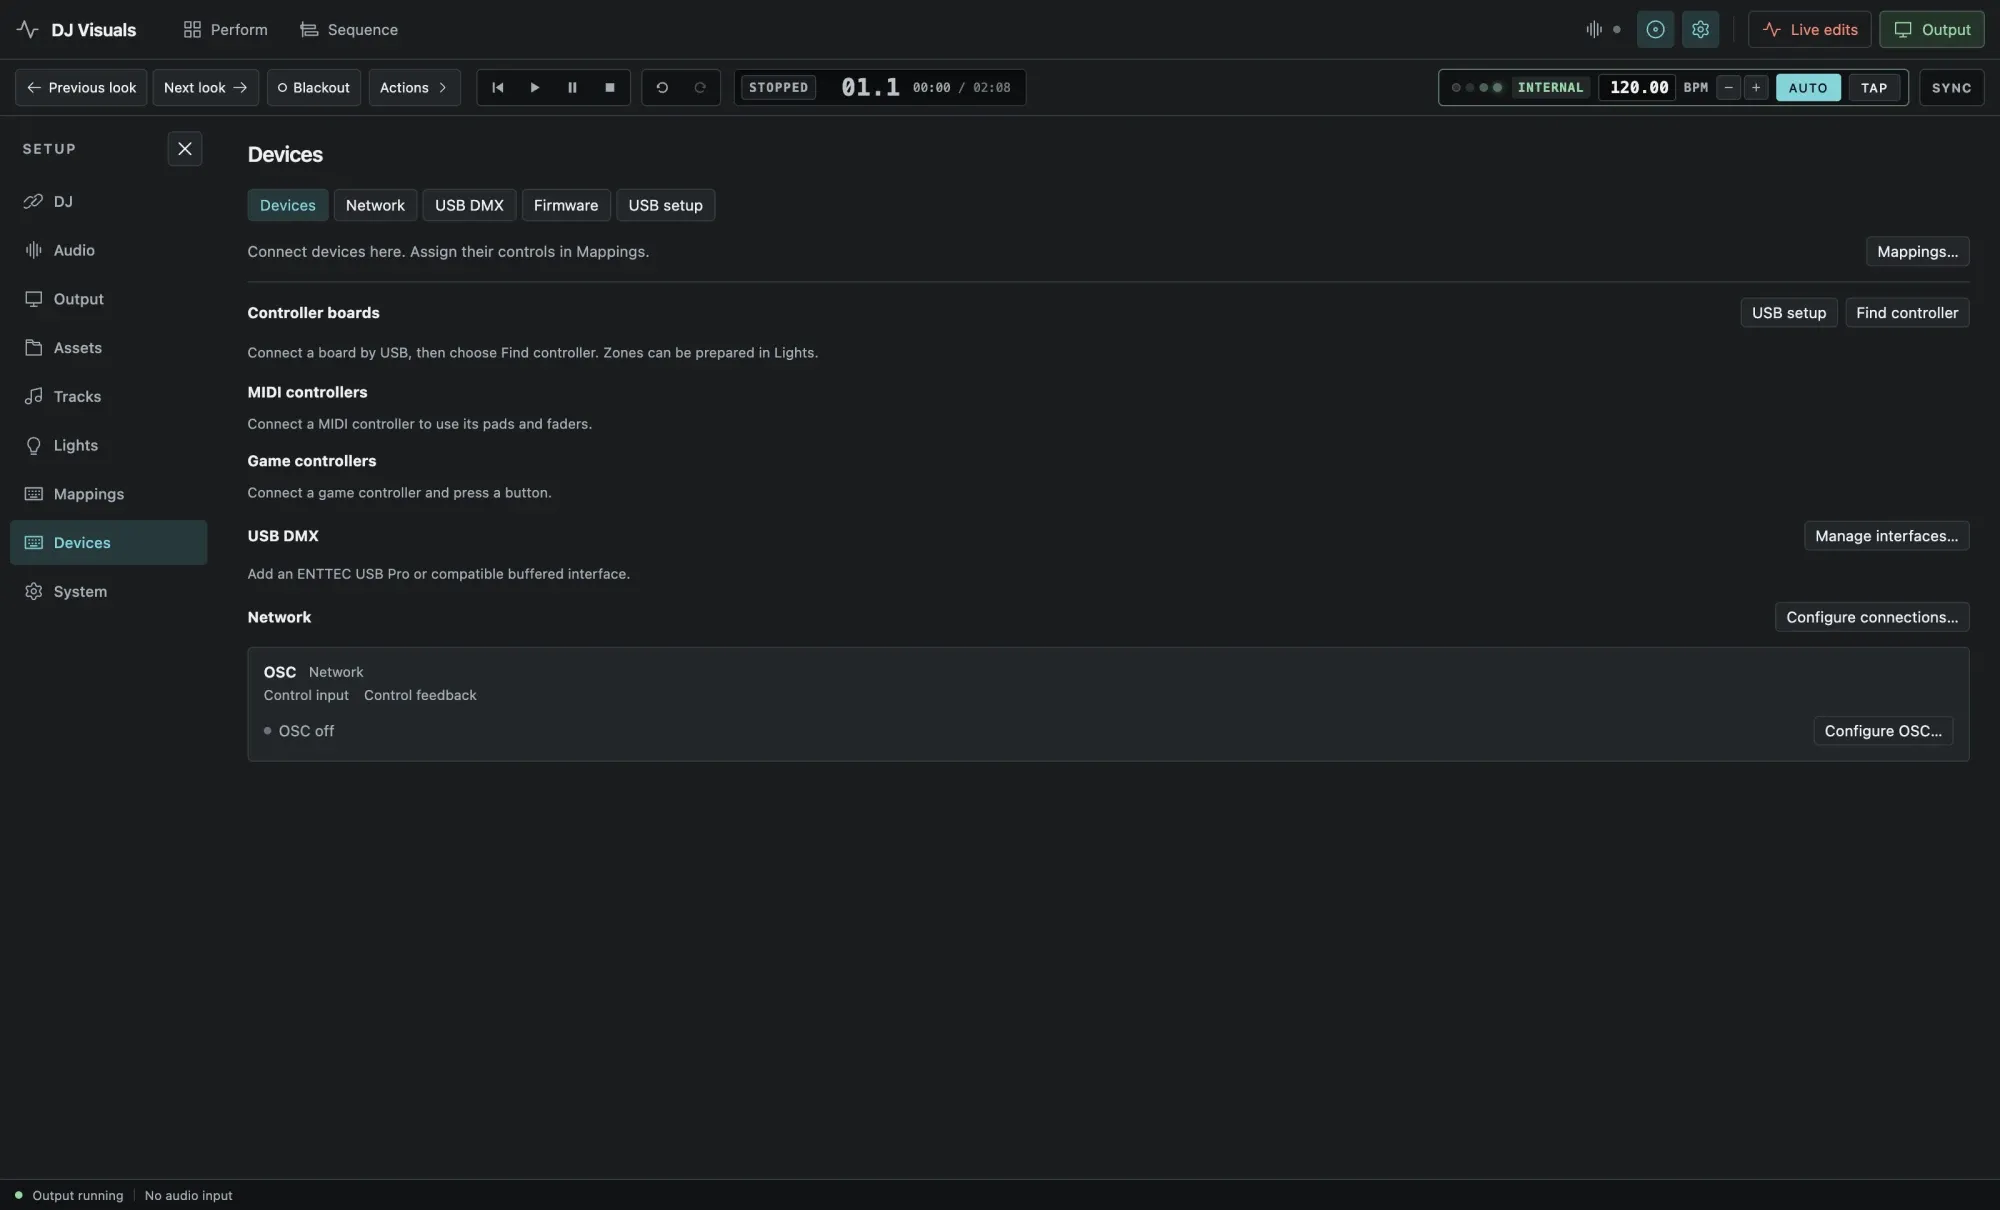
I also didn’t want to open the Arduino tools every time I changed the firmware, so the app installs it by itself. Pick the board, click Install firmware, and it uploads, verifies and reconnects. All the hardware lives on this one Devices page:
At the moment there are 55 lighting effects, from simple ones like breathe, chase and rainbow, to sillier ones like bouncing balls, meteor shower and fireworks. Strips can be joined into groups, so an effect runs across several of them as if they were one long strip. And a Look can include the lighting too, so launching it changes the screen and the room at the same time!
Wrapping up
Some parts are still rough, especially getting the real track position out of Rekordbox and the FLX10 jog screens, and I will write about those once they work. The library manager from my earlier post also kept growing during the same months - so much that it gets a post of its own, which is coming next.
There is no public repository for any of this yet, because it’s tied into the rest of my private tooling. If you want to see the other things I’ve built, they are on my projects page, and my work history is on my career page.
I hope you enjoyed this blog post and I will see you in the next one!